In a few cases, Omada Hardware Controller may become bricked during the firmware upgrade. The most common cause is an unpredictable power failure. This article will guide you to enter the Recovery Mode to recover the firmware.
(This article was taken from TP Link Community forum, and actually worked with it myself with success!!)
Step 1. Prepare the firmware.
Download the latest firmware for your Omada Hardware Controller from TP-Link’s official website, unzip to get the .bin file.
For OC200: https://www.tp-link.com/support/download/oc200/#Firmware
For OC300: https://www.tp-link.com/support/download/oc300/#Firmware
Step 2. Configure the computer for recovery
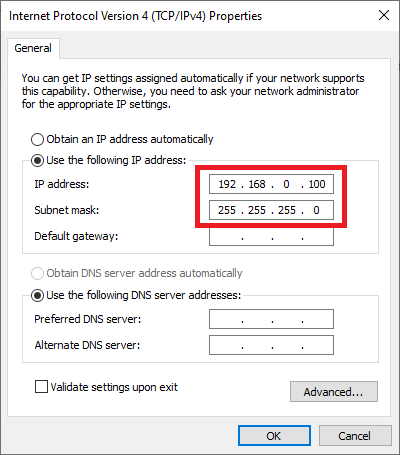
Go to Control Panel -> Network and Internet -> Network and Sharing Center -> Change adapter settings, right-click your Ethernet adapter go to properties -> Internet Protocol Version 4 (for a detailed guide, please refer to FAQ14-How to configure wired TCP/IP Properties of my computer?), and set the IP address/subnet mask as 192.168.0.100/255.255.255.0, as shown below.

Step 3. Force Omada Hardware Controller into Recovery Mode.
Unplug the power cable of the Omada Hardware Controller and connect your computer with Omada Hardware Controller directly.
It is highly recommended that connect your computer to the ETH2 port of your Omada Hardware Controller.
Press and keep holding the RESET button, then plug in the power cable, after that, the Cloud LED and the LEDs of the connected ports will flash, then wait until the Cloud LED extinguishes, now you can release the RESET button.
Note: If your computer is plugged into the ETH2 port of the controller, you can also use ETH1(PoE IN) port for the PoE power supply.

Step 4. Open a Browser to upload the firmware.
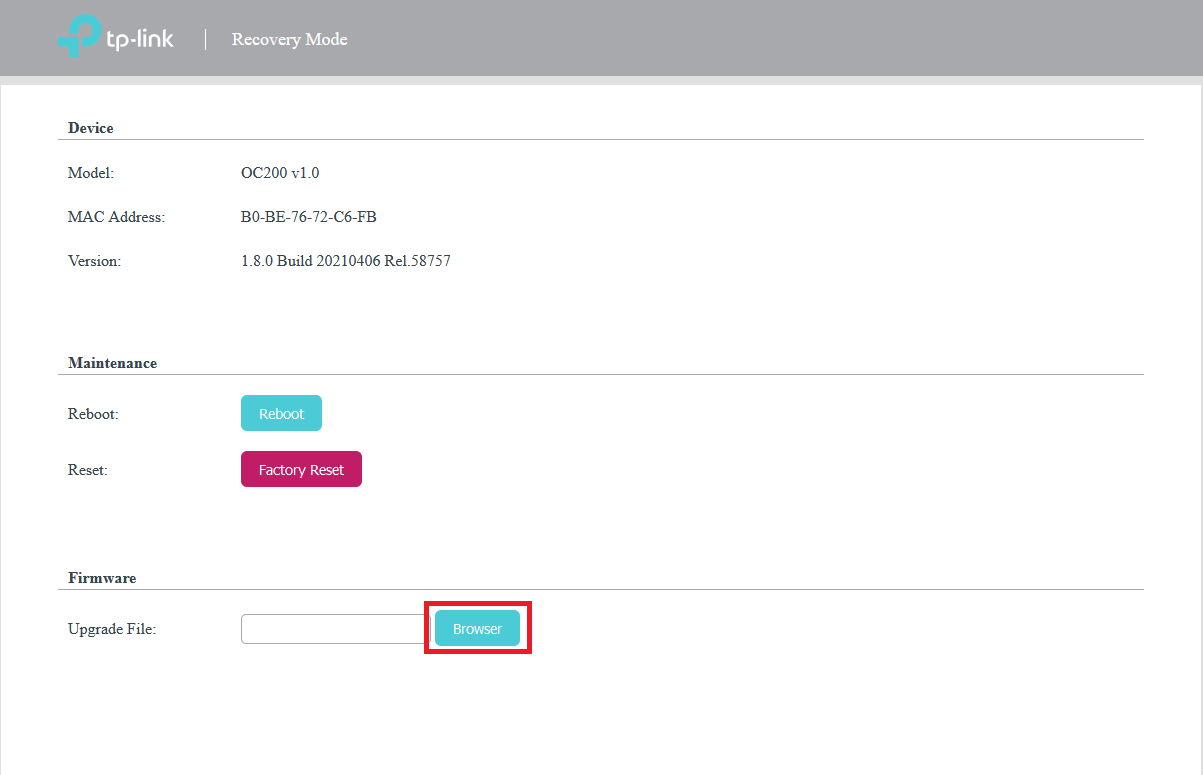
Open a browser and input 192.168.0.253 to the address bar, you will enter the following page.
Click “Browse” to select the firmware (.bin file), then click “Upgrade Now”. After upgrading, the controller will reboot and work normally.